After you buy a recurve bow, you must set it up so it performs to its full potential. This article covers the basics of setting up recurves.
First, remove your bow from its box and tighten all the bolts and screws. The tiller bolts and limb-alignment screws are installed only hand-tight at the factory, and not ready to shoot. Tighten them securely with an Allen key, which should be provided with the riser. Next, install an arrow rest, which uses the plunger hole nearest the archer, unless your coach specifies otherwise.
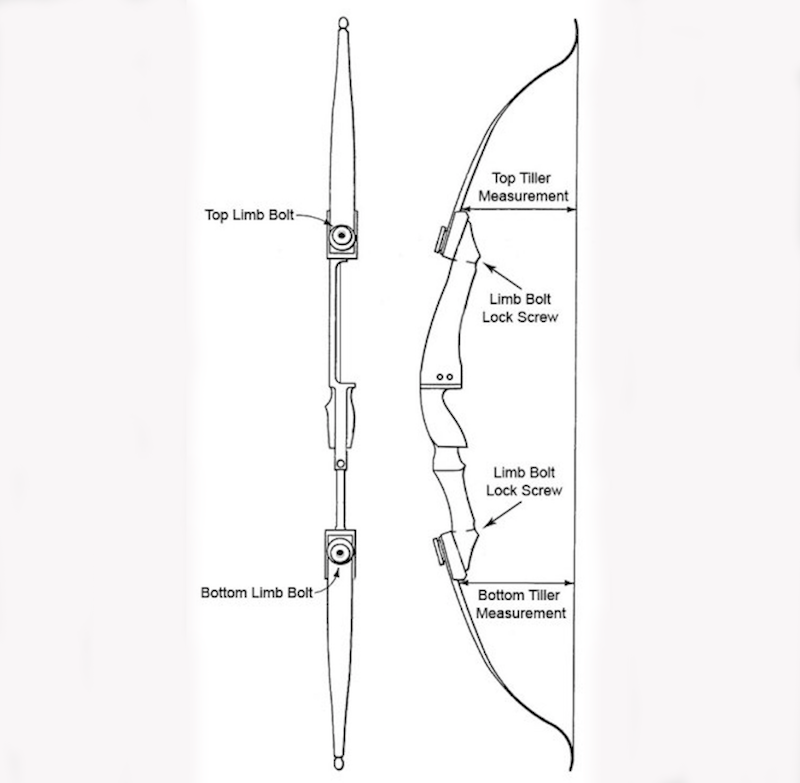
You’ll want to ensure the bow’s draw weight is right for you. Attach the limbs to the riser and string the bow. If your bowstring does not have a nocking point, install one so the arrow is close to 90 degrees from the string while on the rest. You’ll adjust the nocking point’s height more accurately during the tuning phase. Using a bow scale, draw the bow with an arrow on the string until you’re approximately at full draw. (Archers using a clicker can set it so they pull back the exact amount.) Screw in the tiller bolts to increase poundage, and out to decrease.
After setting the bow weight, you must adjust the tiller so you shoot with a tiller that’s 1/8-inch longer on the top limb than the bottom. As a reminder, “tiller” is the difference in distance between where the top and bottom limbs, respectively, meet the riser and bowstring. The top and bottom tillers differ slightly because you do not pull on the bowstring’s exact center when drawing the bow. A top tiller slightly bigger than the bottom tiller ensures the limbs return to brace height at the same time.

With your tiller set, you need to check your limb alignment. Refer to your bow manual to learn how to align your limbs. Different risers use different systems to adjust the limbs’ alignment. To inspect their alignment, install the front stabilizer and stand behind your bow, observing how the bowstring lines up in comparison to the bow’s center and your stabilizer. For good limb alignment, your bowstring should run down the center of your bow and the center of your front stabilizer. Don’t be surprised if you must make several adjustments to align everything.
The final step is to install your plunger and check your center shot, which refers to how the arrow aligns with the bowstring. Install the plunger, nock an arrow, and stand behind the bow so you can look at your bowstring aligned down the bow’s center with the arrow pointed away from you. For proper initial center shot, adjust your plunger so the arrow point is outside of the string. That means the left side of the string for right-handed archers, and right side for left-handed archers.
For right-handed archers, the right side of the arrow point should align with the left side of the string. The opposite applies to left-handed archers. That alignment ensures your arrow follows the straightest path when propelled by the bowstring.
Now that your bow is set up, shoot a lot of arrows through it to get used to how everything feels. Once you’re comfortable with it, you’ll be ready to tune it!


